Setup file storage in your company's SharePoint tenant
This feature is available upon request for companies with a Pro or Premium subscription.
By default, OneTeam offers your company the ability to store documents related to your opportunities securely in the cloud. If your organization uses Microsoft 365, however, you may optionally store your documents in SharePoint Online. This gives greater flexibility including the ability for real-time co-authoring in Word on the desktop and the ability to automatically save document edits online without the need to re-upload.
To take advantage of Microsoft 365 features, you must first set up a storage location for your OneTeam files on your Microsoft tenant - by default these files are stored in OneTeam's Microsoft Azure Gov Cloud. To migrate your company's documents from OneTeam's storage to your company's storage site in SharePoint Online, follow these steps:
Create a SharePoint Site
- Have your company's Microsoft 365 Global Administrator sign in to Office 365.
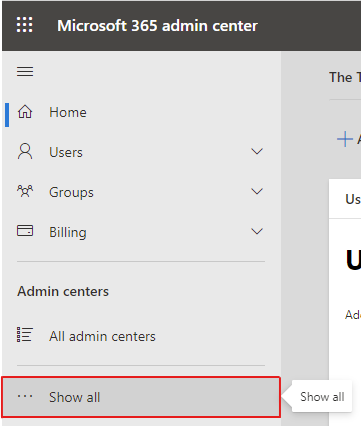
- Select the app launcher icon
 in the top left of the page and select 'Admin'.
 - Within the Microsoft 365 Admin Center, select on 'Show all' on the left navigation bar.
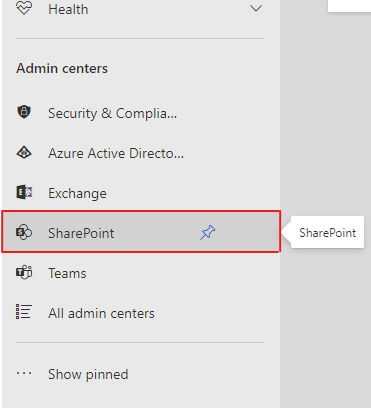
- Expand the 'Admin centers' option and select 'SharePoint'.
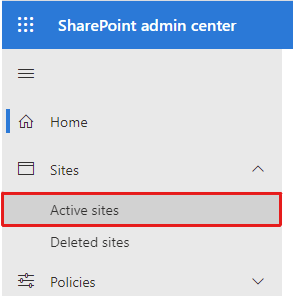
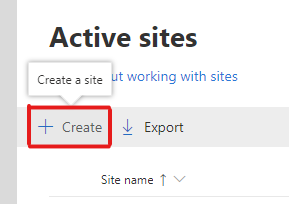
- Once inside the SharePoint Admin Center, expand the 'Sites' option and select 'Active sites'.
- Select the 'Create' button in the toolbar.
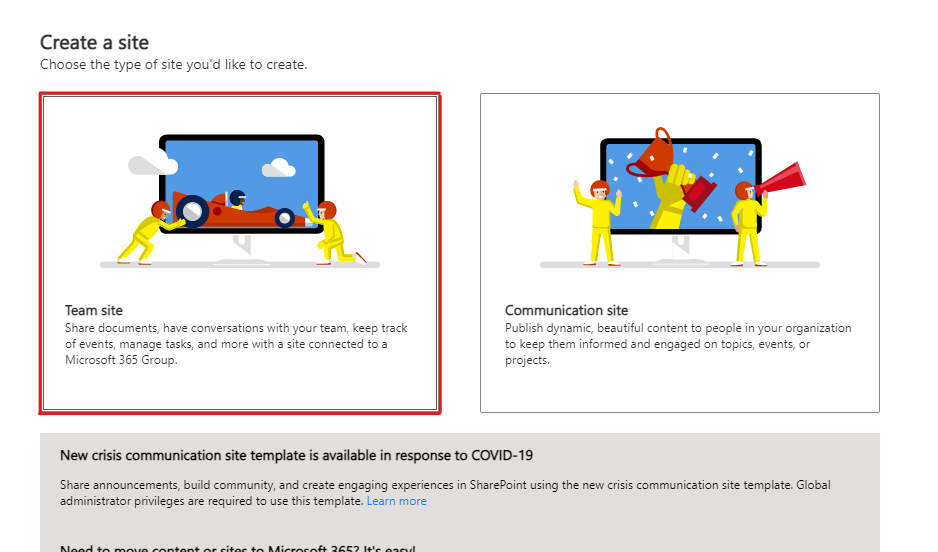
- In the panel that appears, select the 'Team Site' option.
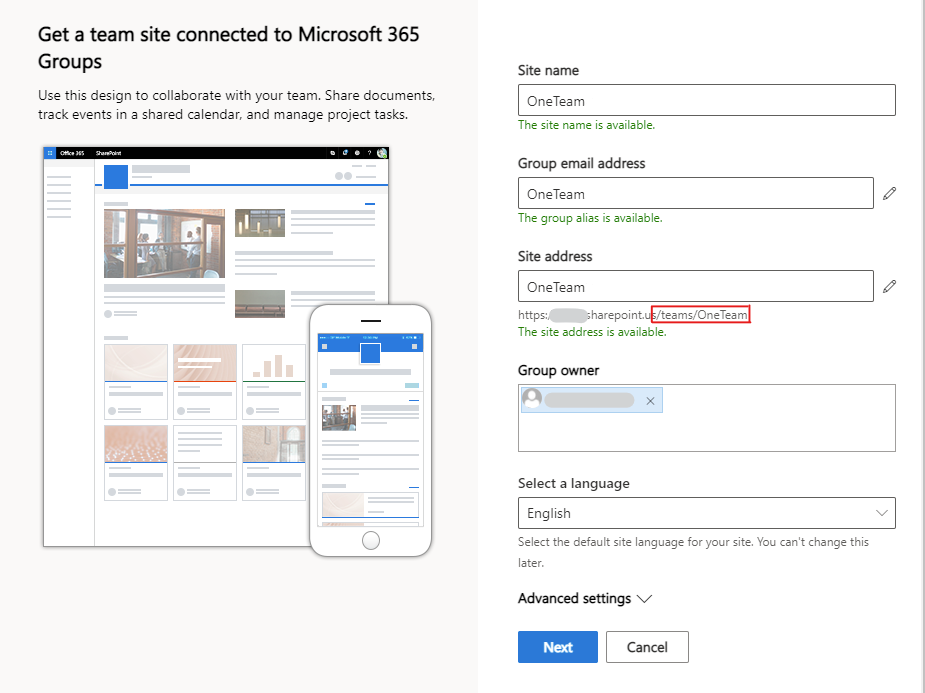
- Set the Site Name to "OneTeam", ensure that the Site Address is '../teams/OneTeam', enter a Group Owner, and select 'Next'. Note: The Site Address must follow this pattern: '../teams/OneTeam'. If the pattern is '../sites/OneTeam', you will need to change the Create Team Sites Under option to '/teams/' under Settings > Site Creation and return to step 6.
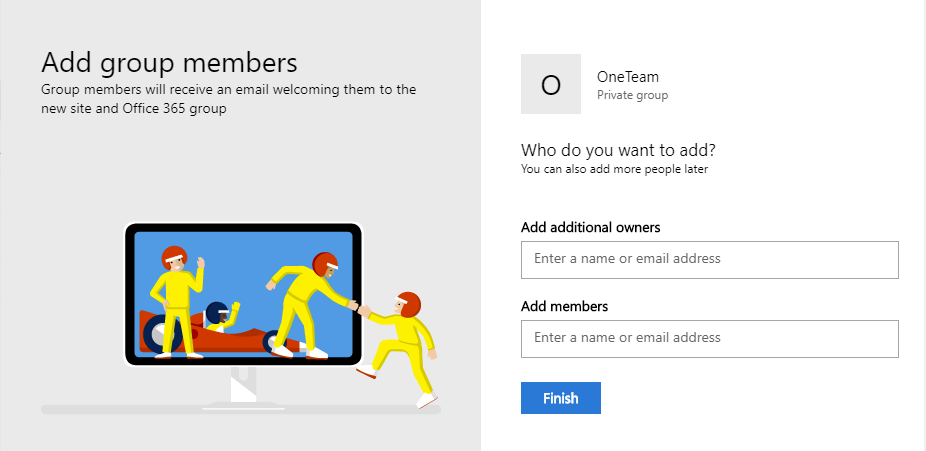
- Add additional owners and members if desired and select 'Finish'.
Enable document sharing with external users
Note: The steps in this section should only be applied if you do NOT intend to store Controlled Unclassified Information (CUI) of Controlled Defense Information (CDI) in your SharePoint Online tenant in compliance with NIST 800-171. If you plan to store CUI or CDI data, continue to the next section - Deploy the OneTeam Word Add-In.
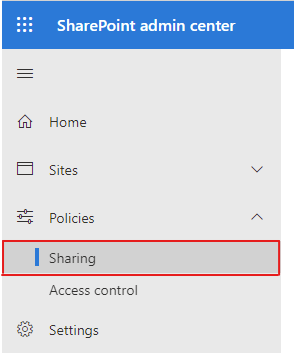
- Within the SharePoint Admin Center from above, expand the 'Policies' option and select 'Sharing'.
- Under External Sharing, select 'New and existing guests' for SharePoint.
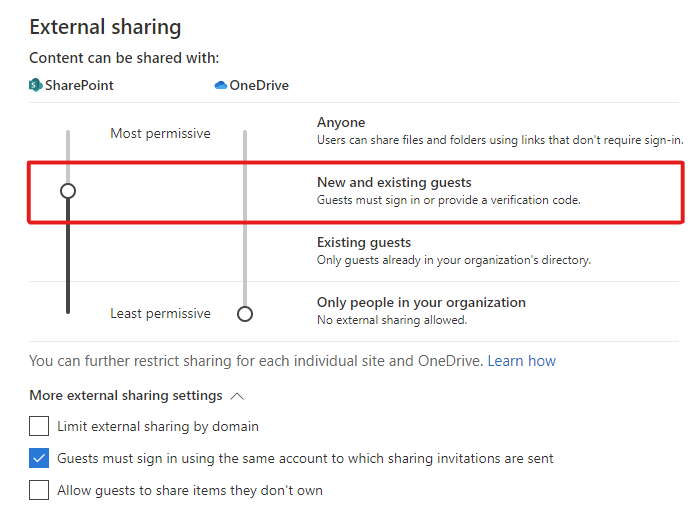
- Scroll to the bottom of the modal and select 'Save'.
Deploy the OneTeam Word Add-in
Note: The steps in this section are only needed if you are using a Government (GCC High) Microsoft 365 tenant. If you are using a Commercial Microsoft 365 tenant, continue to the next section.
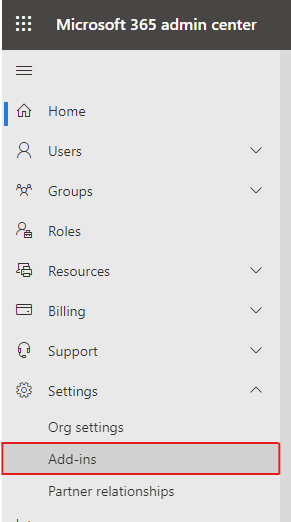
- Return to the Microsoft 365 Admin Center from step 3 of the first section.
- Expand the 'Settings' option and click on 'Add-ins'.
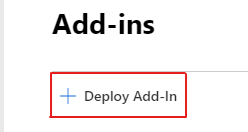
- Select the 'Deploy Add-in' button.
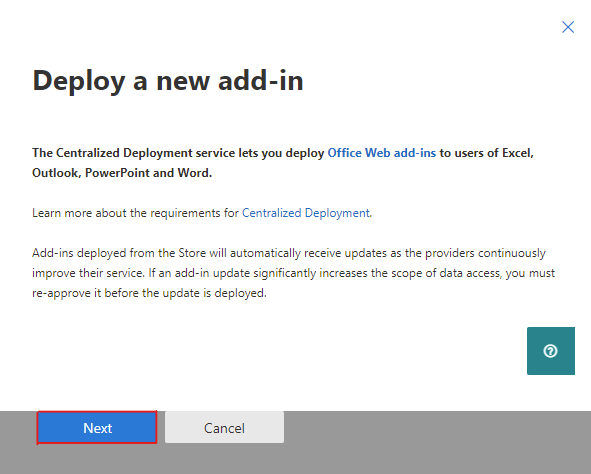
- If you see the Centralize Deployment introduction in the panel that appears, select 'Next'.
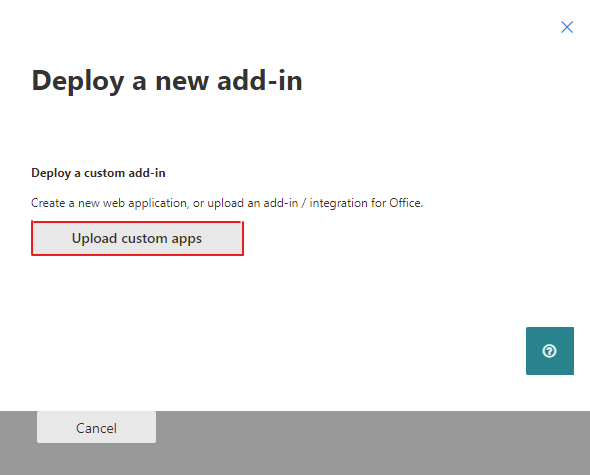
- Select the 'Upload custom apps' button.
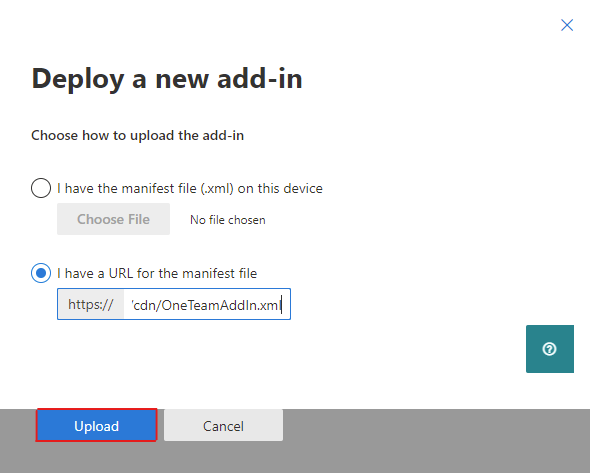
- Select the 'I have a URL for the manifest file.' option, enter cdn.oneteam.net/cdn/OneTeamAddIn.xml in the textbox, and select the 'Next' button.
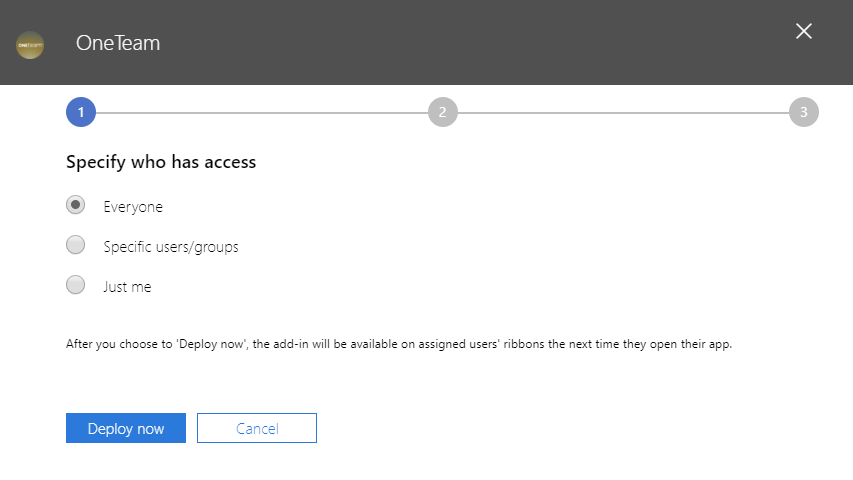
- Under Specify Who Has Access, ensure that 'Everyone' is selected and select the 'Deploy Now' button.
- Under Test the Deployment of the Add-in, select the 'Next' button.

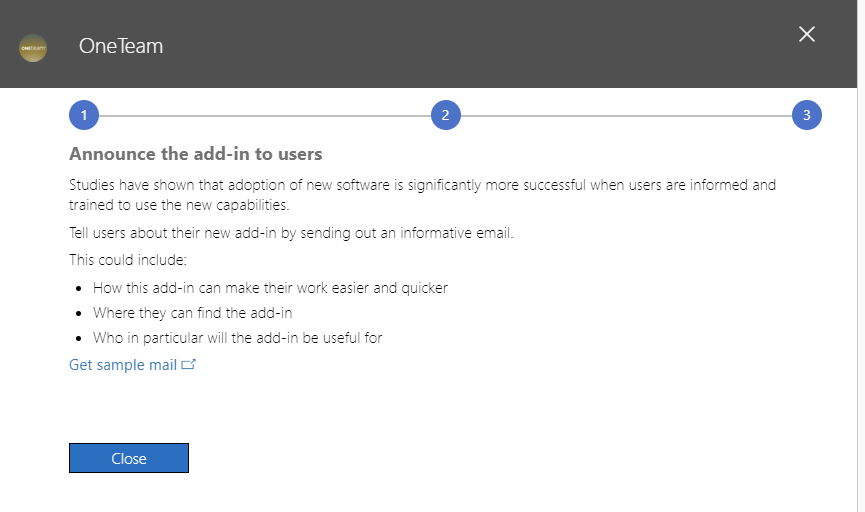
- Under Announce the Add-in to Users, select the 'Close' button.
Authorize OneTeam to store documents in SharePoint Online
- Have your OneTeam Company Administrator sign in to OneTeam.
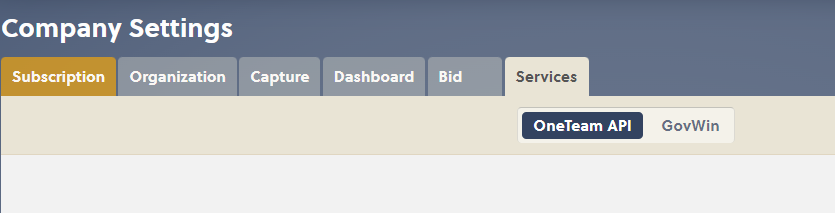
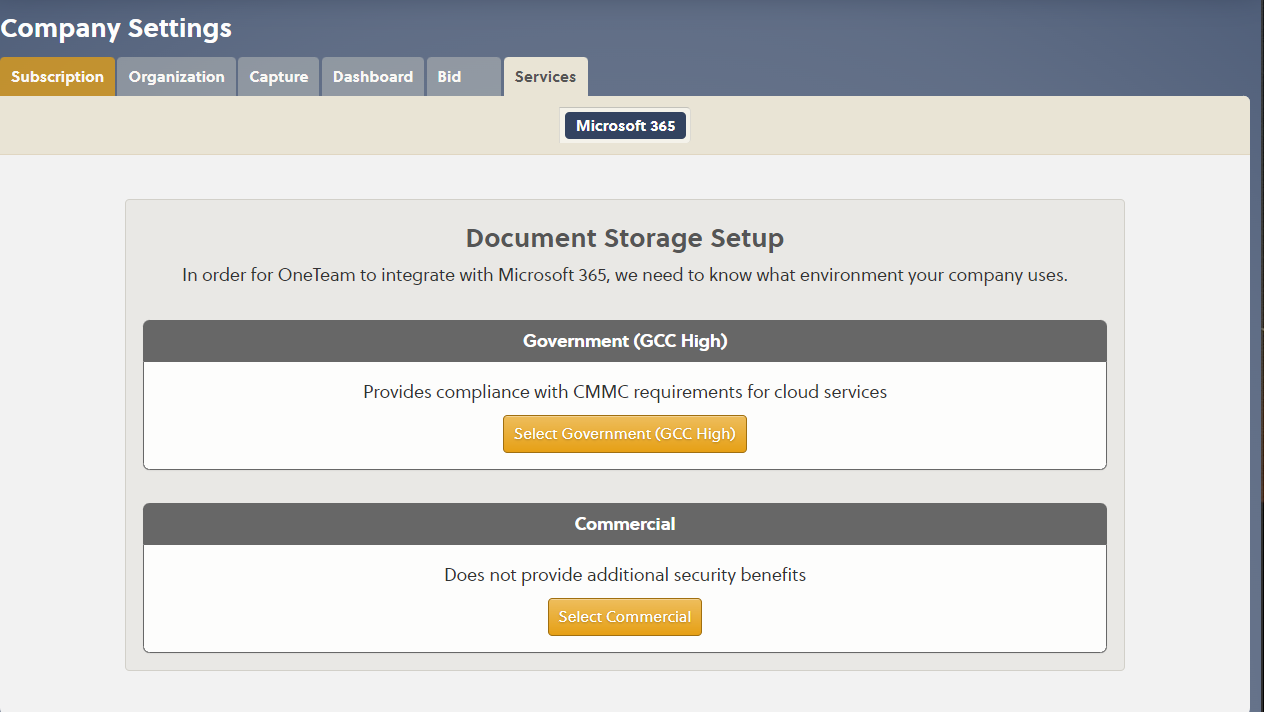
- Go to Company Settings (located under the Account Menu in the top right of the page) and select Microsoft 365 under the Services tab.
- Select either the 'Select Government (GCC High)' or 'Select Commercial' button depending on where your Microsoft 365 tenant is hosted.
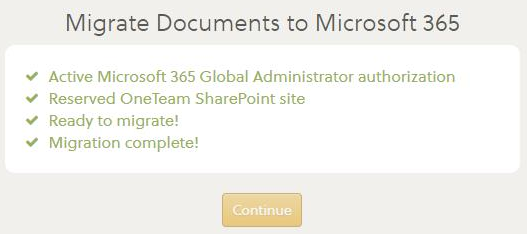
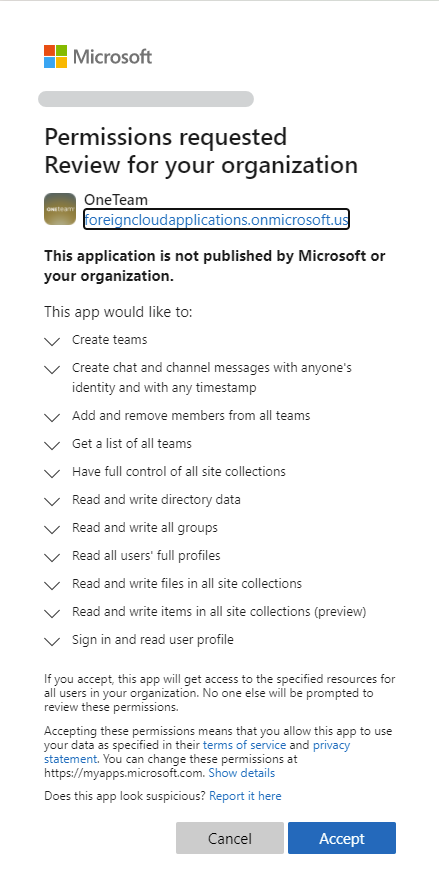
- Select the 'Continue' button to authorize OneTeam to store documents.
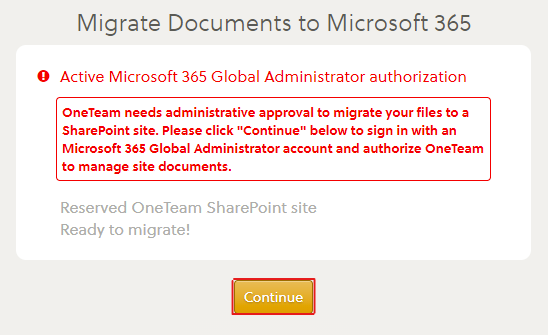
- Have your Microsoft 365 Global Administrator login and select the 'Accept' button.
- Once the checks have completed, select the 'Continue' button to migrate your documents to SharePoint Online. Note: This step may take several minutes depending on the number of documents your company currently stores in OneTeam.
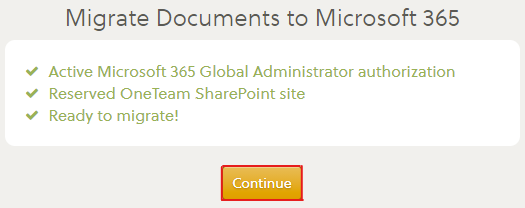
- Once your documents have been migrated over, a success message will be displayed.