Streamline Data Calls and Track Progress
In addition to having your teaming partners fill out their contacts and capabilities, OneTeam allows Opportunity Managers to distribute key documents such as Non-disclosure Agreements (NDAs), Teaming Agreements (TAs) and other information requests or Data Calls. With this capability, you can distribute custom data call documents, approve or reject submissions, and quickly track where each company is in the Data Call process.
Note: Before your teaming partners can access their assigned data call documents, they will have to be a contact with a OneTeam account for the opportunity. They must receive an invitation to join the opportunity in order to receive data calls and participate as part of the capture and/or proposal team. Learn how to invite teaming partners here.
Follow these steps to distribute a data call notice to teaming partners and internal team members who will complete Data Calls:
Distribute to Teaming Partners
- Go to the Documents tab for your opportunity and select the Data Calls sub-tab.
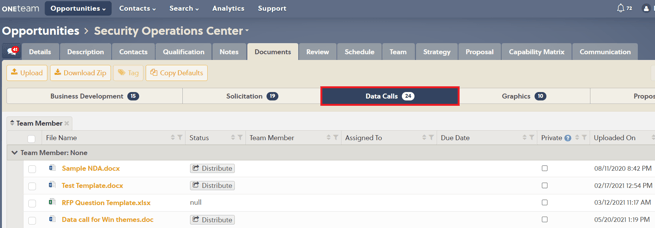
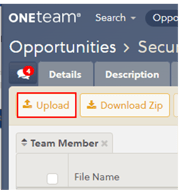
- Select the Upload button to select or drag in and drop a template document to use as a Data Call.
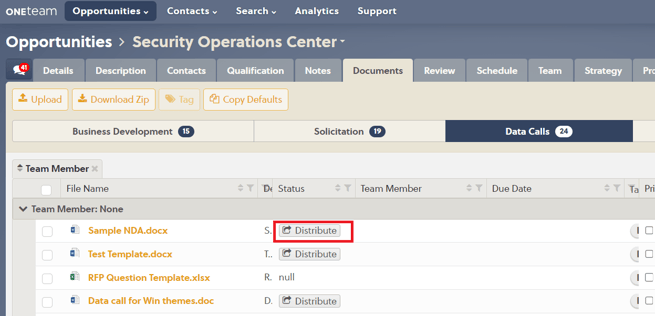
- Once the file has been uploaded, select the Distribute button in the Status column.
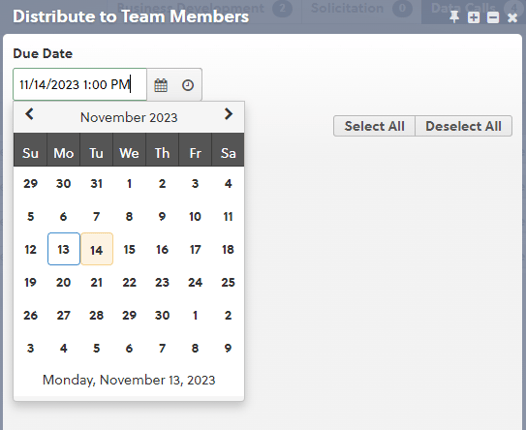
- A new window will open - Distribute to Team Members - where you will select a date and time in the Due Date field.
- Next select the Team Members to which you would like to distribute the document by selecting the checkbox to the left of the company name.
Note: You can always come back and distribute to additional companies later. Companies that have received the selected Data Call document will be grayed out, and the Data Call sender cannot select their checkbox.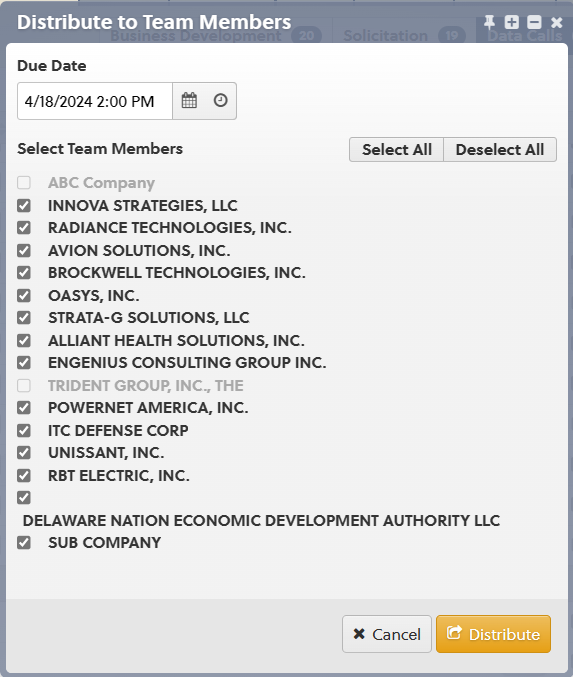
- Select the Distribute button and to generate a copy of the file for each of the selected team members.

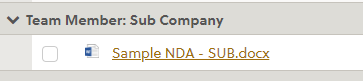
- Observe that the generated documents have a Status of 'Distributed' and are ready for their assigned Team Member to complete. OneTeam does not email the Data Call document. It creates a copy of the Data Call for each company you selected. The company name is shown with their assigned Data Call documents listed below it.
Note: As long as the documents are marked as Private, Team Members can only view and edit the documents to which they are assigned.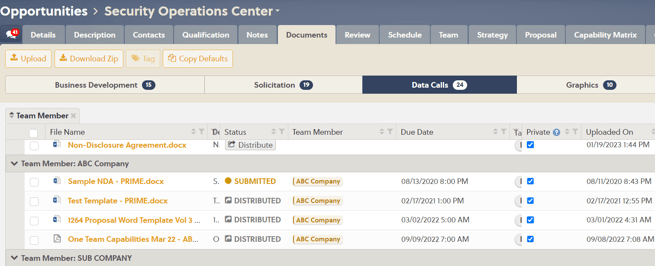
- Let your teaming partners know (via the Communication tab) that their documents are ready for them to fill out! They will receive an email and a notification in OneTeam, but sending them a heads up will always help to ensure they are completing their assignments - especially if this is the first time they have used Data Calls in OneTeam.
Note: It is a good idea to send them a link to these directions for submitting their documents.
Review Submitted Documents
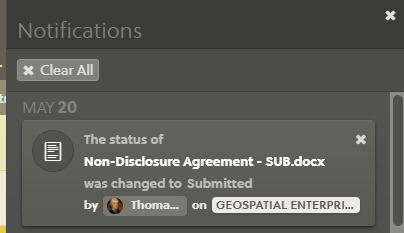
- After a teaming partner has completed their data call document and submitted it, the sender will receive an email and a notification in OneTeam that it is ready for review.
- Select the link in the email to go to the Documents tab of the opportunity or navigate there if already signed into OneTeam.
- Locate the submitted document and hover over the Status field to see the submission details.

- Select the file name of the document to download (or view in Office Online, depending on your company's settings).
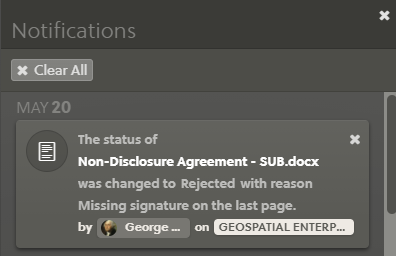
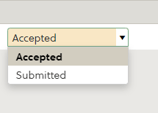
- Once you have reviewed the document, select the Status field and select either 'Accepted' or 'Rejected'.
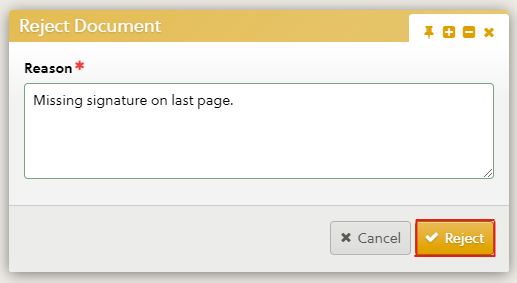
- If 'Rejected' is selected, a window will open with a reason field to complete. This is a required field for all Data Calls that are rejected. After entering a reason, select the Reject button.
- Select the Save button.

- The team member will receive a notification letting them know the status of the Data Call - either Accepted or Rejected - and if they need to make any updates to the document.